User authentication with FIDO
- Introduction
- Enabling FIDO authentication
- Registering a FIDO authenticator
- Authenticating a user with FIDO
Introduction
The Onegini Cordova plugin allows you to authenticate users with FIDO UAF authenticators, if one is available on the device and you have performed the steps described in this topic guide. FIDO authenticators can be used for both regular authentication as well as mobile authentication.
FIDO authentication is not a standard feature of the Onegini Mobile Security Platform. It is licensed separately since it depends on other third-party software.
Enabling FIDO authentication
In order to enable FIDO authentication for your application you must add an additional Cordova plugin to your application project.
cordova plugin add git+https://[email protected]:Onegini/cordova-plugin-onegini-fido.git
INFO: It is required that you add the FIDO plugin before you add the normal Onegini Cordova plugin (cordova-plugin-onegini). Due to the way dependencies are resolved, FIDO authentication will not work if the fido plugin is added after cordova-plugin-onegini. An example:
cordova plugin add git+https://[email protected]:Onegini/cordova-plugin-onegini-fido.git cordova-plugin-onegini
Setting up iOS
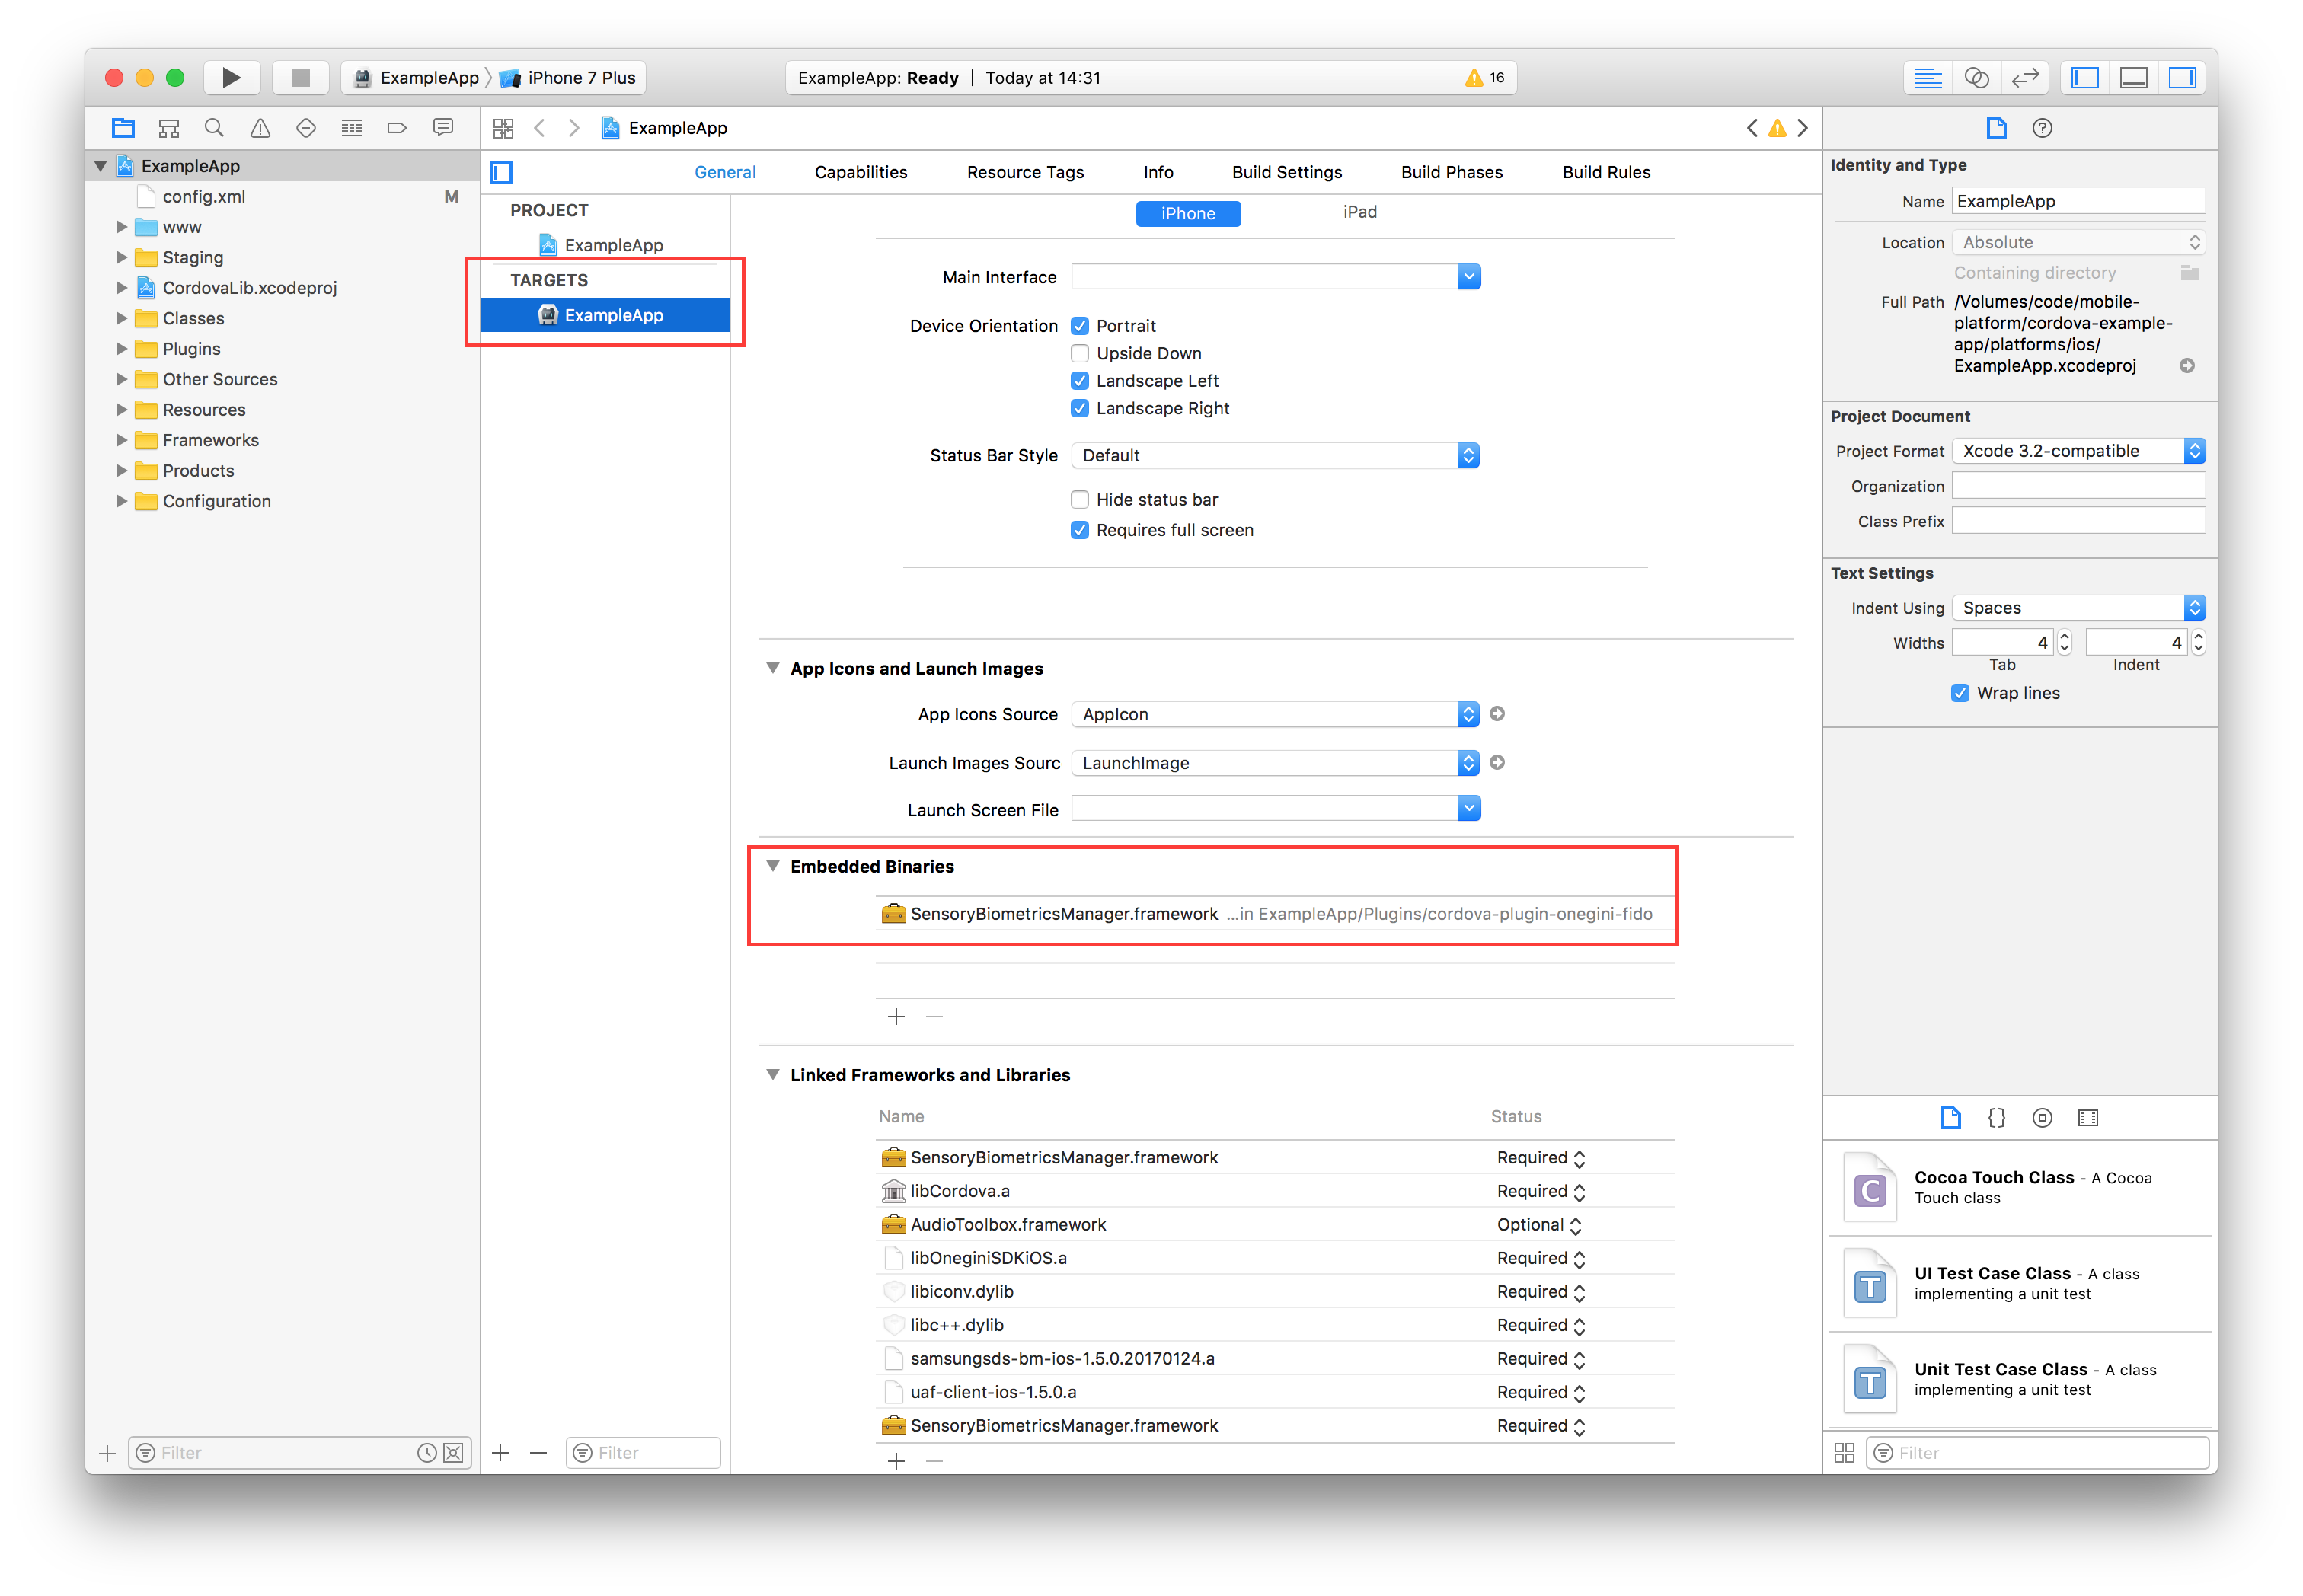
Because Cordova does not support adding frameworks as embedded binaries, you must manually modify the Xcode project before you are able to build & run your application.
The SensoryBiometricsManager.framework must be added as an embedded binary to your application target.
Add the SensoryBiometricsManager.framework to the 'Embedded Binaries' by clicking the + sign and selecting SensoryBiometricsManager.framework.
The result should look like the image below:
Registering a FIDO authenticator
In order to register a FIDO authenticator for a user, the Onegini Cordova plugin provides the onegini.user.authenticators.registerNew.
To register a FIDO authenticator, you will need to implement the onSuccess and onError events. As part of the
FIDO authenticator registration flow the user is asked to perform a certain action. This could for instance be to place their face in front of the camera
(for face authentication) or place their finger on the fingerprint scanner (for FIDO fingerprint authentication).
FIDO Authenticators that requires such actions come embedded with their own UI.
Example code for registering a FIDO authenticator:
// Lookup one of the FIDO authenticators. There could be multiple FIDO authenticators, but for this example we simply use the first FIDO authenticator we find.
onegini.user.authenticators.getNotRegistered({ profileId: 'profileId' })
  .then((authenticators) => {
    let fidoAuthenticator = authenticators.find(authenticator => authenticator.authenticatorType === "FIDO");
    onegini.user.authenticators.registerNew(fidoAuthenticator)
      .onSuccess(() => {
        alert('Success!')
      })
      .onError(() => {
        alert("Error!\n\n" + err.description);
      });
  });
FIDO authentication may not be available on every device. In this case, or if the authenticator has already been registered, the above method will return an error. Please verify the specifications of the FIDO authenticators to see which authenticators should be working on the device that you are using. FIDO will not work on a simulator.
To request a list of available authenticators that have not yet been registered, the plugin exposes the onegini.user.authenticators.getNotRegistered
function, which takes the profileId of the desired user as argument. If the device does not meet the FIDO requirements, the FIDO authenticator will not be
present in the returned array of of authenticators.
Note that registering a new authenticator does not set it as the preferred authenticator for the user, which is PIN by default.
To change this, onegini.user.authenticators.setPreferred can be used.
Authenticating a user with FIDO
Once a FIDO authenticator has been registered and set as the preferred authenticator, the user is able to authenticate with that authenticator. The method to
do so is the same as for PIN, the onegini.user.authenticate method.
However, if FIDO authentication is a possibility for the user, extra handler methods must be implemented. This is in addition to the PIN specific methods (which are necessary in case of fallback to PIN).
Example code to log in a user with FIDO:
onegini.user.authenticate({ profileId: "profileIdOfUser" })
    .onPinRequest((actions, options) => {
      // for Fallback to PIN
      var pin = prompt("Please enter your PIN");
      actions.providePin(pin);
    })
    .onFidoRequest((actions) => {
      let callback = (result) => {
        if (result == 1) {
          actions.acceptFido();
        } else {
          actions.fallbackToPin();
       }
     }

      navigator.notification.confirm('Login using FIDO?', callback, 'Authenticate', ['Continue','Use PIN']);
    })
    .onSuccess(() => {
      alert("Authentication success!");
    })
    .onError(() => {
      alert("Authentication error!\n\n" + err.description);
    });