Configuration setup example apps
Minimal Token Server setup to get started. Intended for the iOS example app and Android example app. Please note that the config below is not a production setup, just to get started developing.
1. Login on the Token Server admin
Make sure you login using administrator access to the Token Server admin UI. You should either receive the credentials from Onegini when using a hosted (trial) environment. Otherwise, you can ask your system administrator in your organization for the credentials as setup in quickstart installation.
2. Configure IDP
Under the identity provider configuration (admin/identity-provider-config), we'll setup a custom IdP by clicking the Add button.

We'll use the CUSTOM type for testing purposes only. This IDP will simply allows app users to register no matter what (allow access grant).
We'll simply give it a name, so it can be referenced in the application config. Let's use CustomIDP.
Furthermore we'll set this config as default and enable it.
See the section identity providers for more information about this configuration.
3. Add read scope
Go to the Configuration section (admin/oauth-config) and click Scopes (admin/oauth-config/scopes).
Click the Add button to add the read scope.
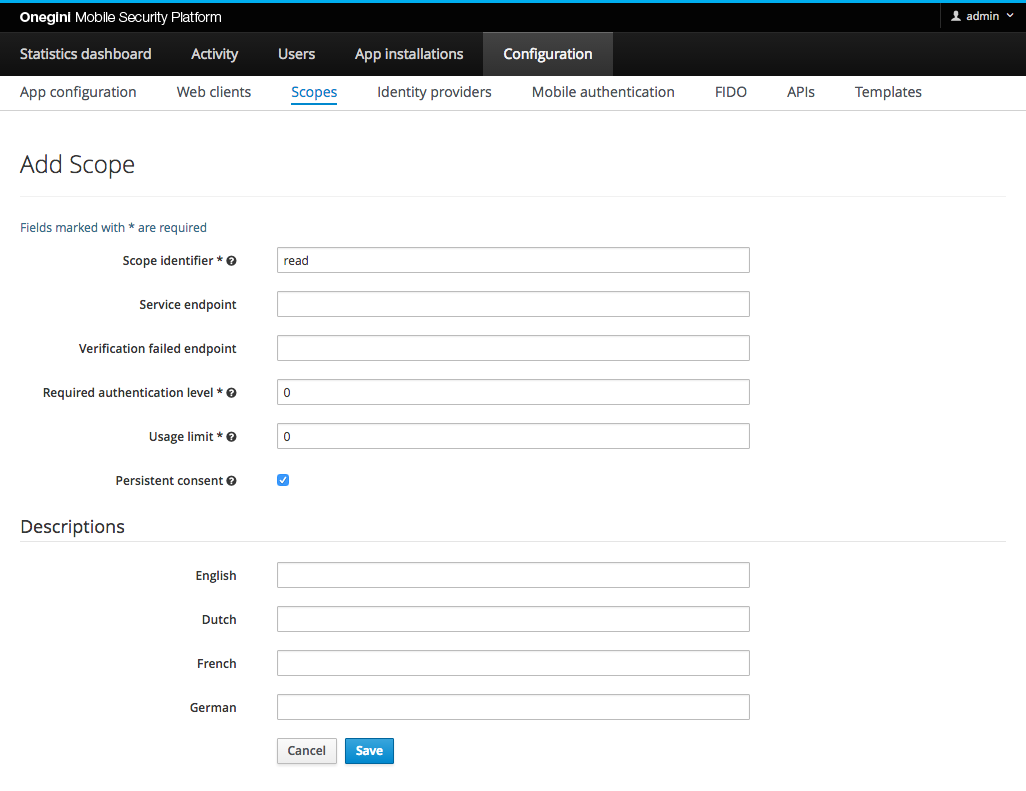
read will be the identifier. The req. authentication level and usage limit is 0.
It does not matter whether Persistent is checked or unchecked.
See the section on scopes for more information.
4. Add application config
Now we'll add configuration specific to our new application: ExampleApp.
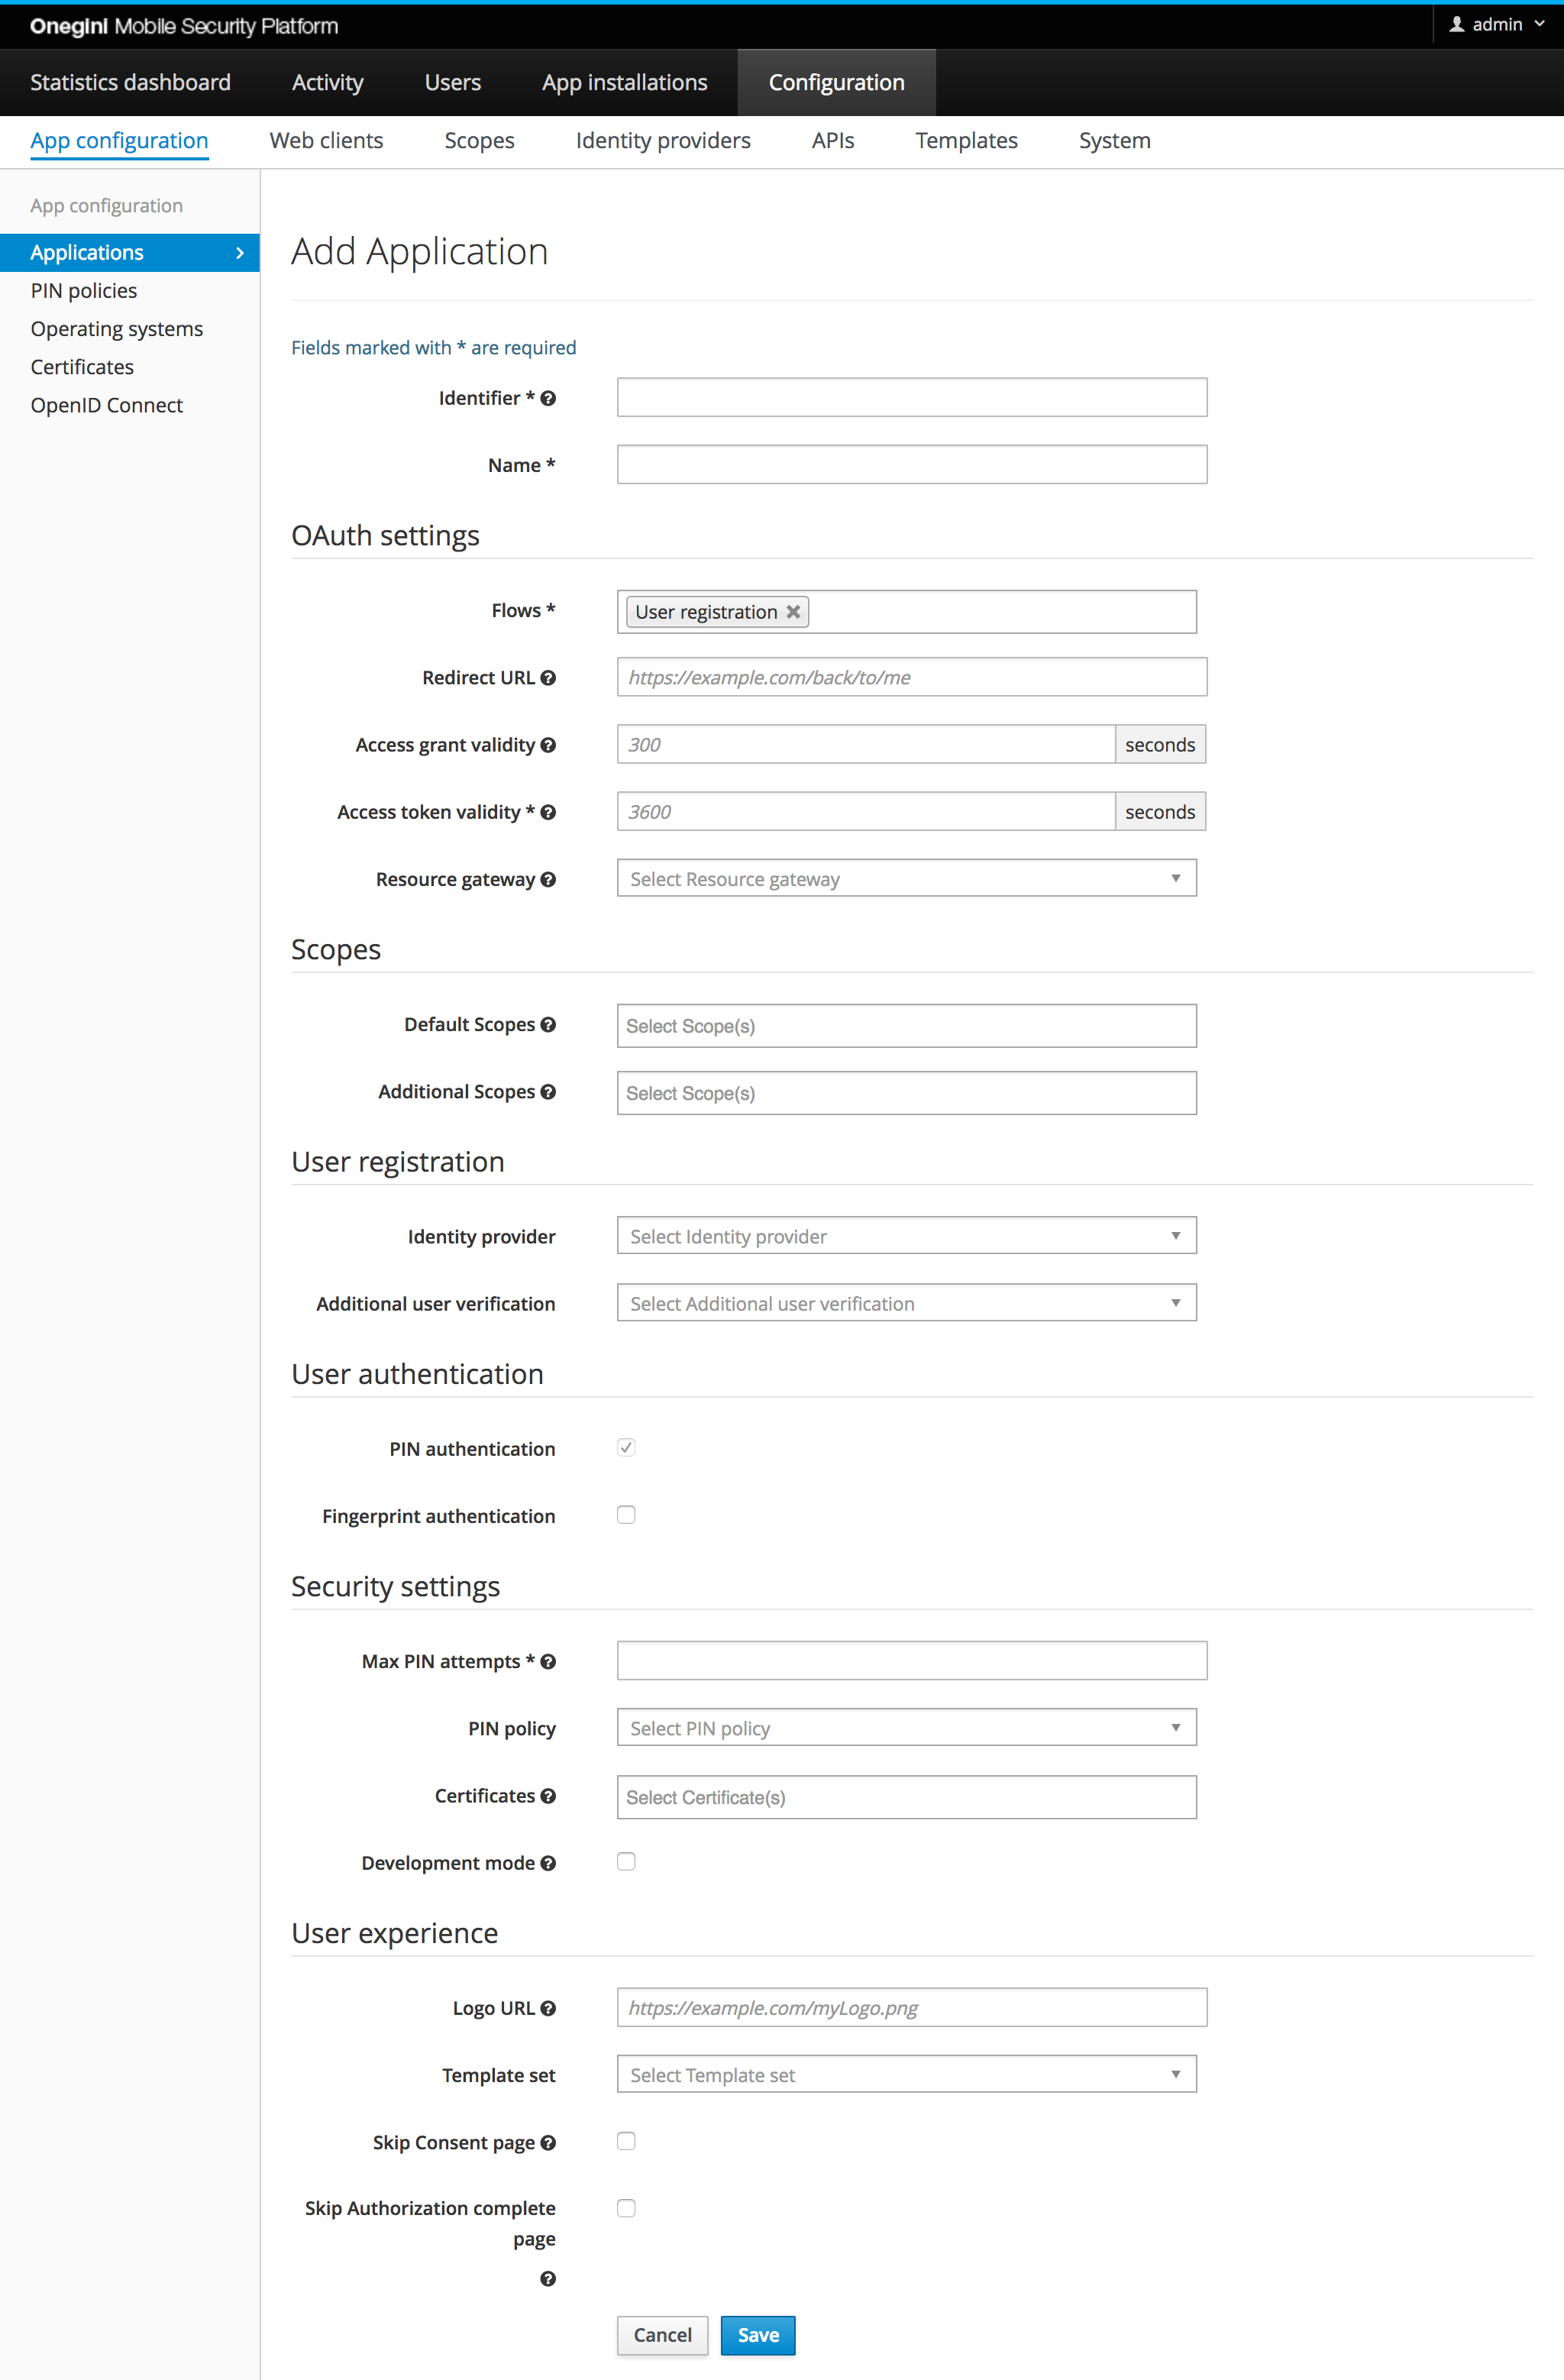
- Identifier is
ExampleApp. - Name is just used within the admin panel as a reference, e.g.
Example app for quickstart. - Flows, choose:
User registration. - Redirect URL is
oneginiexample://loginsuccess. - Access grant validity: 300.
- Access token validity: 3600.
- Resource gateway: leave empty.
- Default scopes:
read. - Additional scopes: leave empty.
- Identity provider, select the
CustomIDPthat we have just created. - Additional user verification: leave empty.
- Custom Authenticators enabled: unchecked if present in the form.
- Fingerprint authentication: unchecked.
- Implicit Authentication: checked. If the checkbox is disabled, make sure you have applied the
User registrationflow. - Max PIN attempts 3.
- Select the correct certificate(s) when using https for the Token Server. Otherwise the app cannot connect to the Token Server over https. Contact your sysadmin if you cannot select the correct certificate(s).
- Logo Url and prefix can be empty.
- Check
Skip Consent page,Skip Complete pageandDevelopment mode. You can upload new certificates under:admin/oauth-config/certificates.
More information on app config
Add App version
In the list of App configurations, click on the App configuration that you have just created (admin/oauth-config/applications/view/ExampleApp).
On this page you can add an App version. You must do this for each new version of the app for each platform.
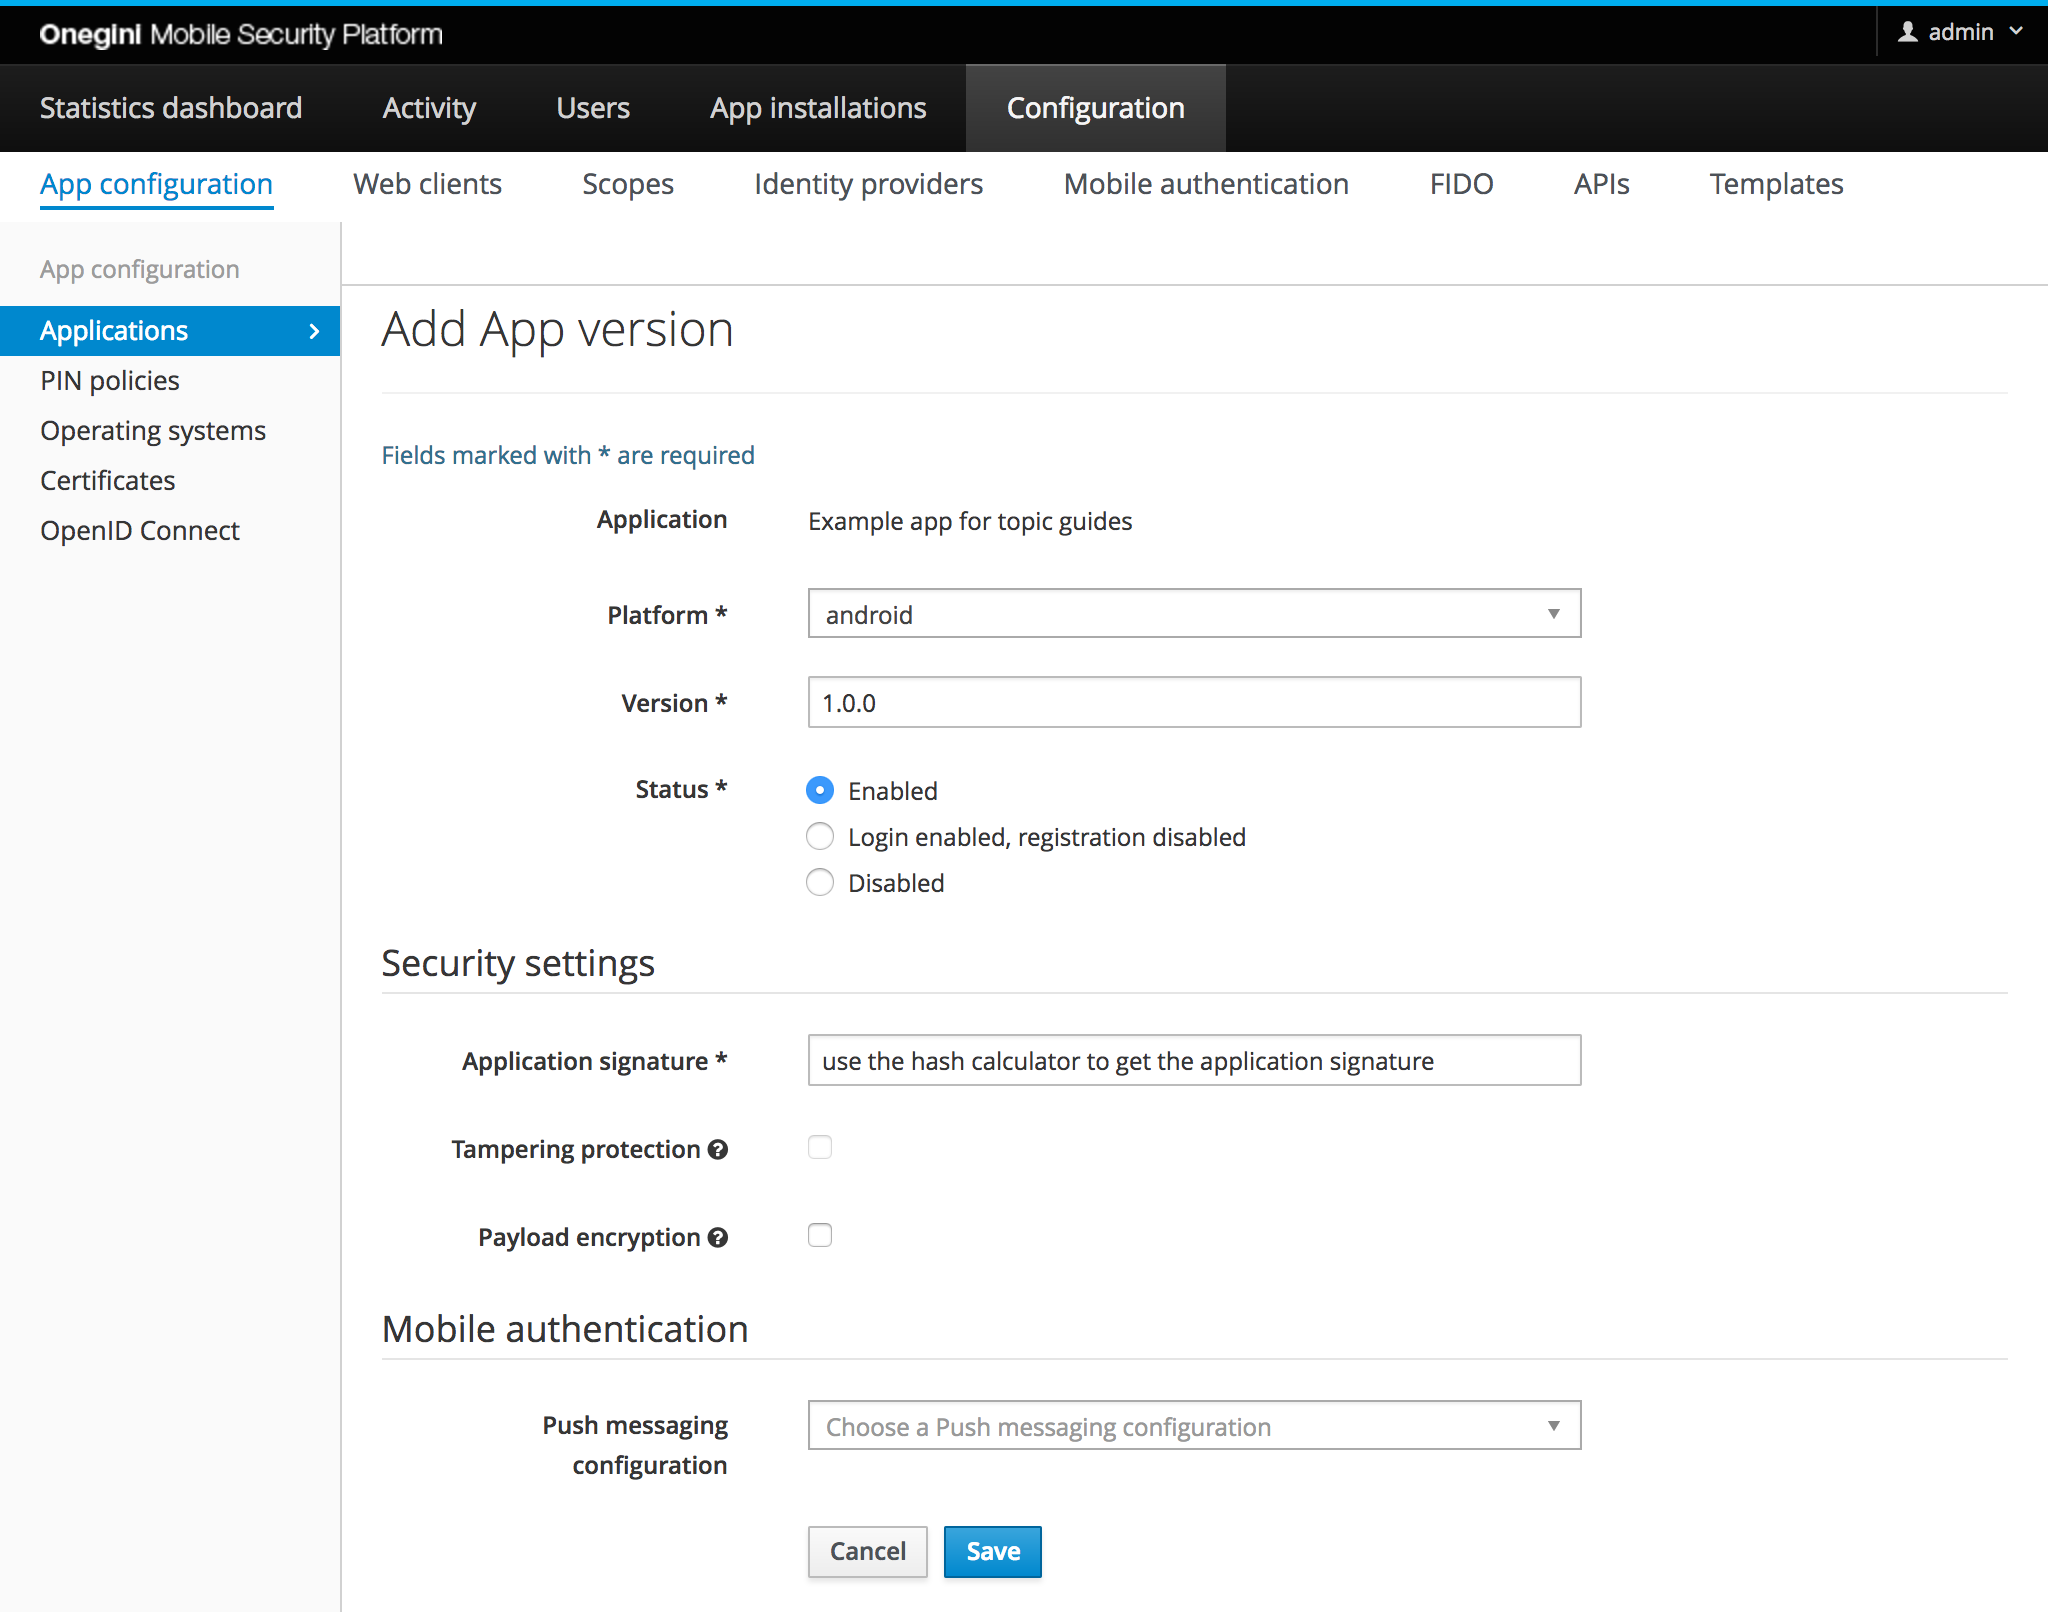
- Choose Platform
iosorandroid - Version
1.0.0 - Application signature: you can fill out
anything, because we have checkeddevelopment modein the App configuration. - Status:
Enabled - Tampering protection, Payload encryption and Disabled: do not check.
- Push messaging configuration: leave it empty.
More information on app version config
Now you should be able to test the configuration using the example app. Let us know if you have any troubles.